

Blog
How to Build a Workflow

Workflow software breaks down the tangled knots of daily processes into smaller, more understandable threads that can be conceptualized and modified as needed. But here’s something we might not all realize — while workflows are powerful tools, we sometimes get so caught up in our own operations that we forget how these workflows are best utilized. It’s time to get back to basics.
What is a Workflow?
A workflow is defined as a sequence of processes through which a piece of work passes from beginning to end, often including various degrees of approval, edits, and updates. But how do you create a workflow? We’ve got a step-by-step process for how to create the optimal workflow for automation.
How to Build a Docubee Workflow
Step 1: Map Out Your Process
Business process mapping is critical before building your workflow. No matter how well you know your procedures and protocols, it’s important to start by considering the process from beginning to end. Think about every document, form, and contact that is included. Examine each step individually and in relation to one another. Record everything required before you start building your workflow in a workflow automation tool.
Step 2: Use One of Our Templates or Build a Workflow from Scratch
Once you have your process mapped, you’re ready to build your workflow. In Docubee, you have three options:
- Use one of our workflow templates
- Import or duplicate an existing workflow
- Create a workflow from scratch using our Workflow Builder
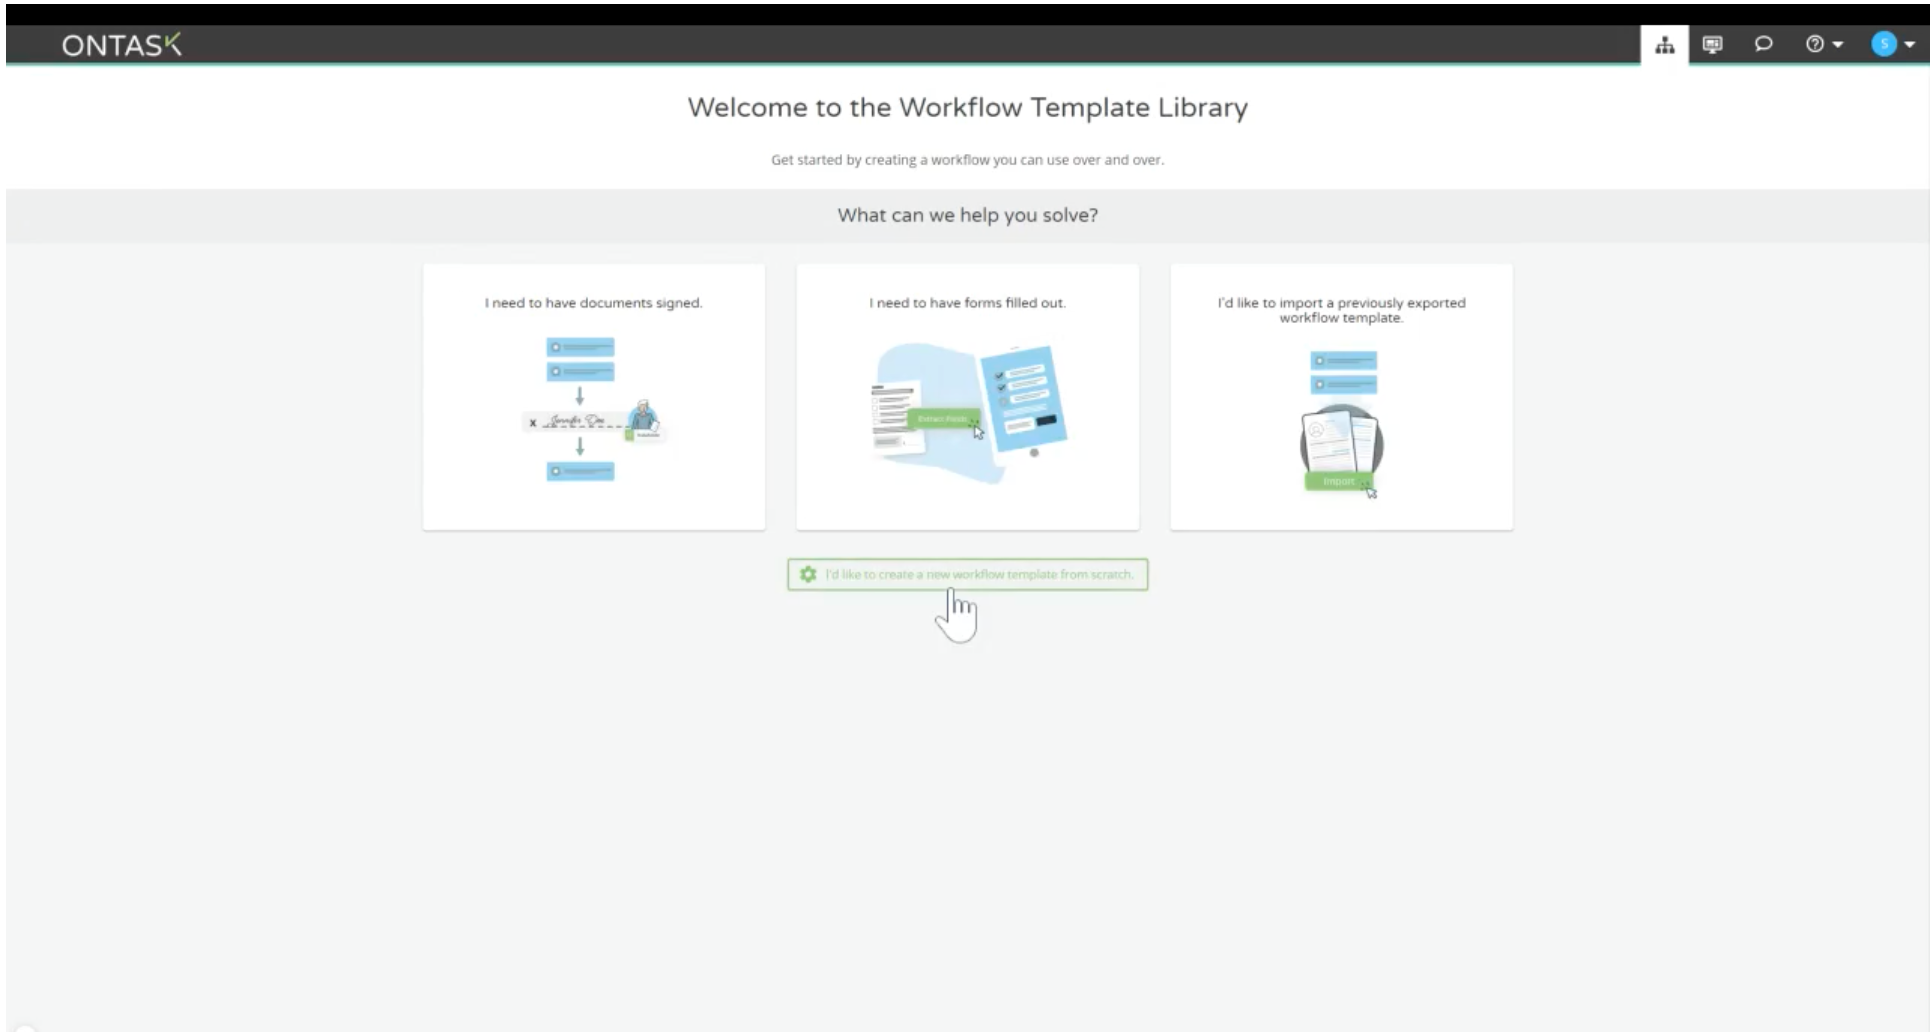
Our workflow templates are highly customizable, so you can see if they meet your existing needs or if you need to build your workflow from scratch.
For example, if you click “I need to have forms filled out,” you’ll be directed to a template assistant that will guide you through the steps of creating a workflow for forms. Watch the video below to learn more:
If your workflow doesn’t fall into one of our templates, or you would like to create something more advanced, you can choose to create a workflow from scratch using our Workflow Builder. Watch the video, and keep reading, to see how.
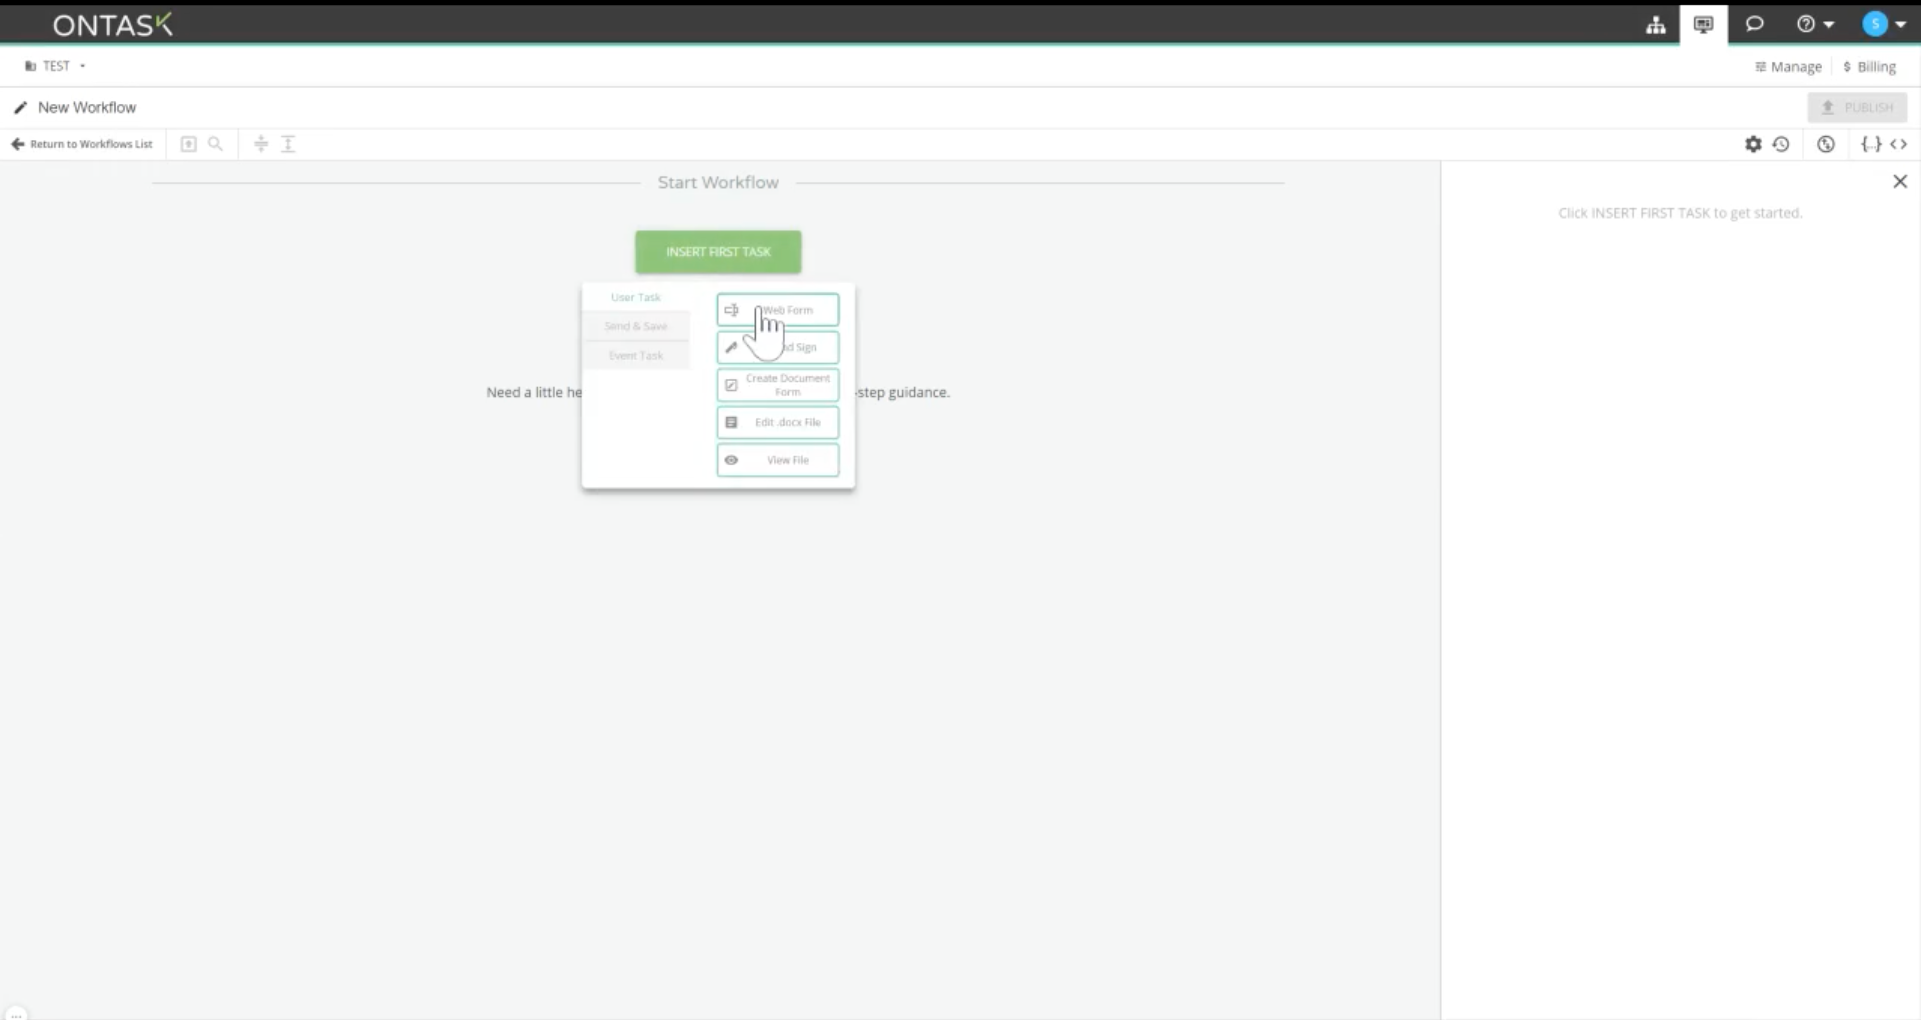
Step 3: Start Building Your Workflow with User Tasks
Every workflow begins with the start form, where you can select from different task options. User Task blocks allow you to insert tasks for participants. These include tasks that involve documents, such as collecting digital signatures, and tasks that facilitate viewing documents or web forms.
- The Web Form block facilitates the creation of webforms using a wysiwyg interface. Web Forms are useful when collecting initial inputs for a workflow or in later steps to collect inputs from workflow participants.
- The Fill & Sign block facilitates the importing of documents for use in the workflow to collect user inputs and signatures. With Fill & Sign, you can quickly insert input fields over your existing documents and signature blocks. The Fill & Sign step “burns” the user’s input onto the document with full legal compliance e-signatures.
- The Edit .docx File block allows participants of the workflow to work on a .docx document. You can allow certain participants the ability to Edit, Suggest, or View the document. This can be very useful if you need participants to review and contribute changes to the document as part of the workflow, such as in contract redlining.
- The Create Document Form block allows participants of the workflow to upload their own forms and prepare them for signature. Similar to Fill & Sign, this block allows participants to edit the form. This block is always matched with a Fill Document form block, but you can insert other blocks in between as needed. For example, you can insert an Email block in between them to request a signature from a participant.
- The View File block allows workflow participants to view files. This can be useful in scenarios that require a file’s approval, or if users need to download a finished document.
Most workflows can benefit from starting with a Web Form that prompts users for initial inputs, such as name and email address.
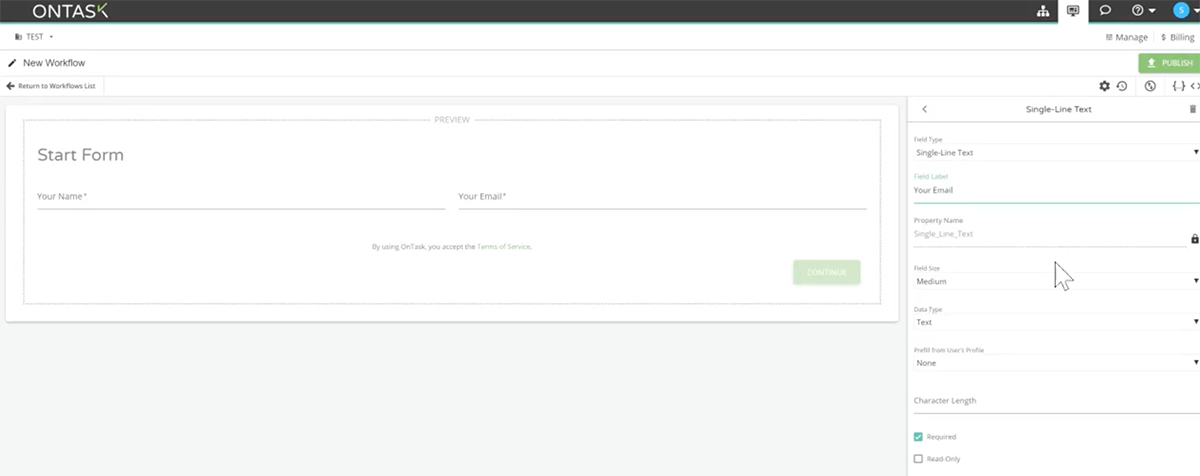
You have the option to set data types and property names depending on your process.
Step 4: Continue Building Your Workflow with Send & Save Blocks
Once you start building in your user tasks, you’ll notice that you also have the ability to add in Send & Save blocks. These workflow components allow you to communicate with participants and export files and dates from Docubee to other systems.
- The Send Email block allows you to send an email message to participants. With Send Email, participants can be alerted to tasks they must complete within Docubee. For example, Send Email can be used to request a participant’s signature on a document.
- The Export Document block allows you to send files and data from Docubee to other systems. For example, you may want to transfer a completed document to cloud file storage, or insert collected participant inputs into a database or CRM.
- The Webhook block is similar to the Export Document block. OnTask’s webhooks capabilities allow you to trigger events in other systems by making http requests to those systems. You can use this to synchronize Docubee workflows with events in other systems, or allow other processes to proceed upon completion of tasks within Docubee.
- The Zapier Event block allows you to connect your Docubee workflow with thousands of applications supported by Zapier.
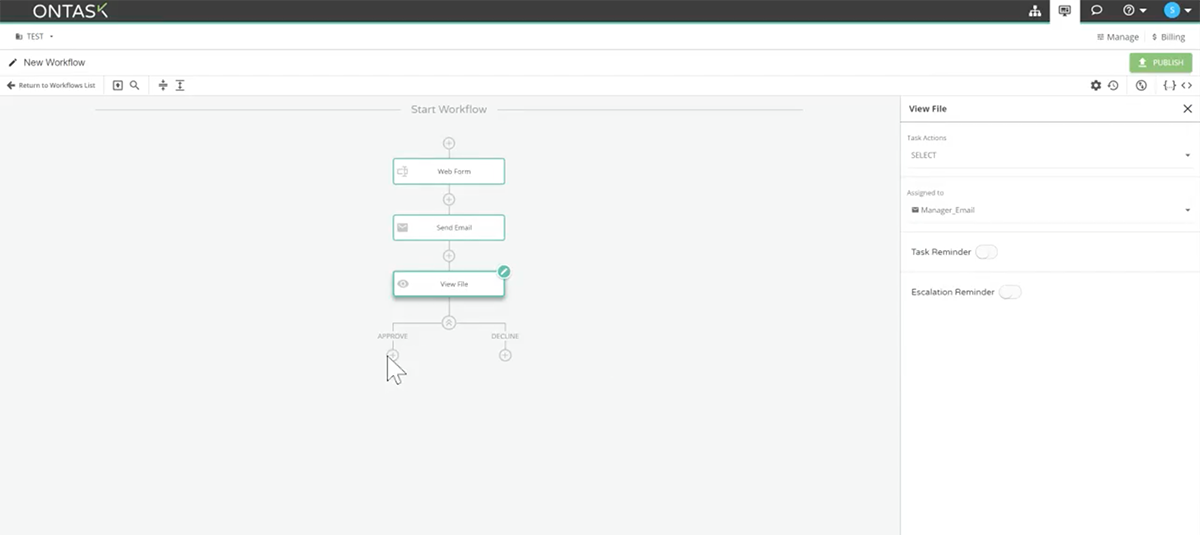
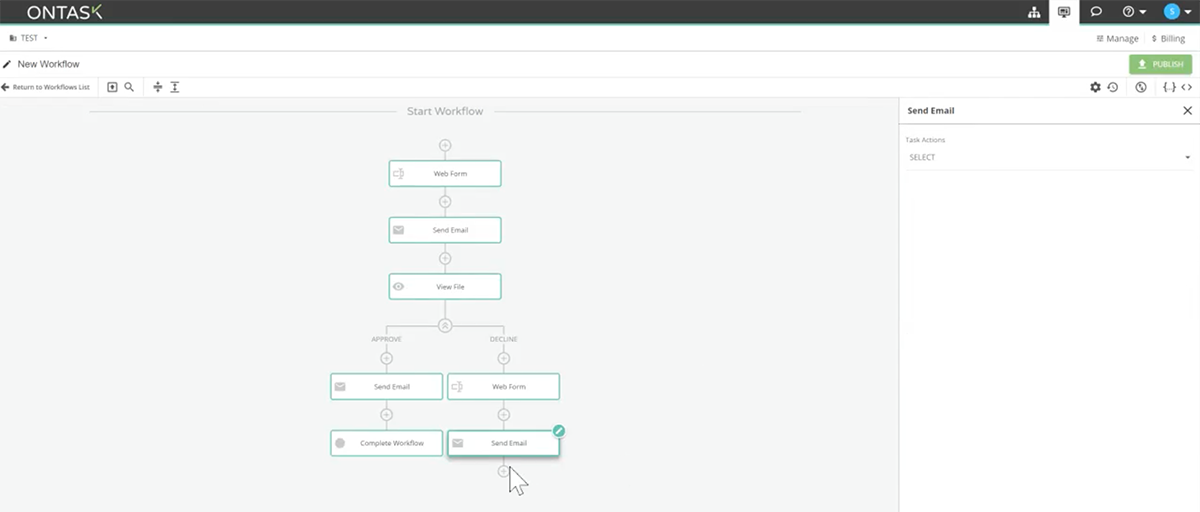
As you can see in the workflow example above, Send Email and View File have been selected as user tasks. The participant is uploading an invoice for a manager to approve in the View File step.
Step 5: Use Conditional Branching
In Docubee, you don’t have to build a workflow for every instance of a situation. Instead, you can use conditional logic to account for different situations and rules in your workflow.
- The Exclusive Branch block is used to select alternate paths in a workflow based on conditional logic. This is useful when Event Task alternate paths are required based on inputs from participants to form. For example, this could include requesting delegation of a task to someone else or declining to sign a document.
- The Parallel Branch block is used to execute multiple tasks in parallel. This is useful in scenarios where multiple participants can perform a task concurrently. For example, this could include multiple reviewers reviewing a document or multiple email messages being sent to various participants
- The Link block is used to redirect participants to arbitrary steps throughout a workflow. For example, Link blocks can be used to implement a “go back” functionality allowing participants to revisit prior steps in a workflow.
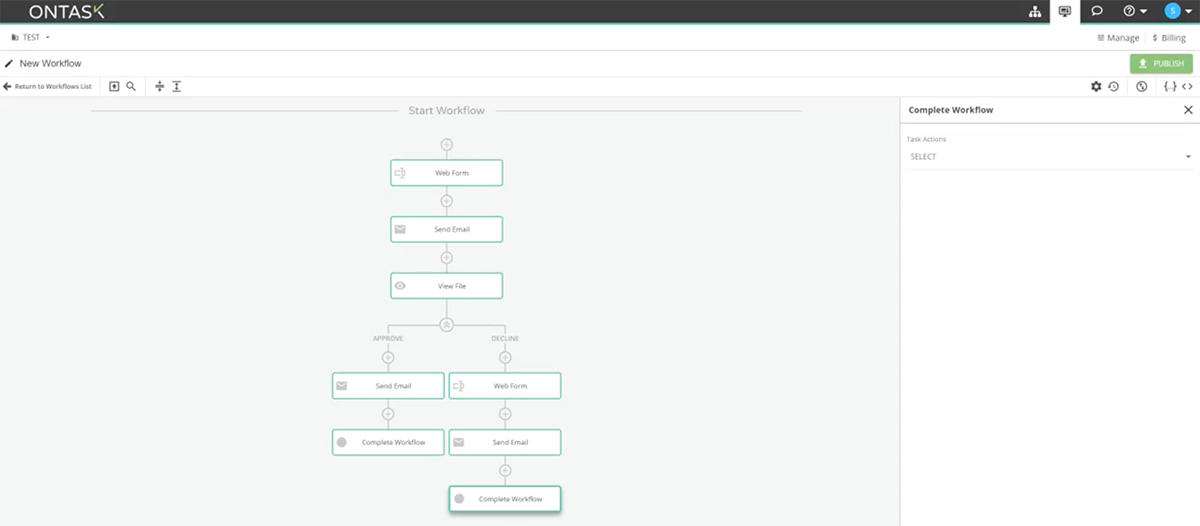
In the example above, the branches are created depending on whether or not the invoice is approved or not. If the invoice is approved, the stakeholder will receive an email notifying them that it has been approved. If it is declined, they can put the reason for declining, using Web Form and then send it to the person who submitted it using Send Email. You can name these different paths to keep them organized.
Step 6: Set Reminders to Ensure Participants Complete Their Tasks
Do you feel like your workflow has a lot of moving parts and participants involved? No need to worry. There are many ways you can customize your workflow in Docubee to ensure it runs smoothly, including:
- The Task Reminder feature, which allows you to autically remind participants of tasks they need to complete in Docubee. This is a convenient way to keep workflows flowing efficiently with minimal oversight
- The Escalation Reminder workflow, which makes it so participants can be automatically alerted of tasks that require urgent attention. This is a convenient way to alert supervisors that team members need a nudge to complete a task.
Step 7: Complete Workflow
After you have completed your workflow, you can use the Complete Workflow block as a terminal node. When a workflow reaches a Complete Workflow block, all execution of the workflow terminates. Any ongoing tasks will no longer be available to participants and the workflow will be transitioned to the complete state.
There are other options you may need to add into your workflow at this point, including:
- The Cancel Workflow block, which is a terminal node. When a workflow reaches a Cancel Workflow block, all execution of the workflow stops. Any ongoing tasks will no longer be available to participants and the workflow will be transitioned to the Cancel state. This block is useful for scenarios when the workflow administrator needs to know that a workflow was completed with an error or exception that may require further action.
- The Milestone block, which is used to track achievements throughout the execution of a workflow. When a Milestone block is reached, you can see a change in the state of the workflow execution on the Docubee dashboard, allowing you to monitor the execution process.
Step 8: Set Access and Roles
If you haven’t done so already, now is the time to set access to your workflow and to tasks within the workflow. As you build your workflow, you can control who has access to what and set roles for each task.
This was critical for The Wyanoke Group as they implemented Docubee for their employee review process:
“I like the reporting because I love giving managers the permission to see where an employee review was at in the process,” says Brandon Veiga, IT Manager & Project Specialist. “It’s easy to see the individual roles and secure the permissions. Security was crucial for this project as this process involves reviewing employee performance and there is salary information involved. We wanted to be able to grant certain users permissions where other users are denied.”
Step 9: Run, Share and Educate
Once you finish building your workflow in Docubee, hit “run” to set it live. There are also a number of ways to share it with participants, including sharing a hyperlink, posting a QR code, and sending via SMS text messaging.
Educating your participants and stakeholders on the new workflow is key, especially if it is their first time experiencing Docubee.
Step 10: Repeat
After you have created your first workflow in Docubee, you don’t have to start from scratch. It’s easy to duplicate an existing workflow, select a workflow template from our workflow template library, or use the template assistant. With reusable processes, workflows, and documents, you can get up and running in no time, with no code necessary.
Build Your Workflows in Docubee
Docubee is an easy, intuitive workflow automation tool that digitizes, streamlines, and simplifies your processes. With flexible integrations, powerful automation capabilities, and user-friendly delivery methods, you’ll be able to focus on what’s important — and let your workflows do the work for you.
