

Blog
How to Create an Online Form in Docubee
Creating a digital form in Docubee is easy. Whether you’re starting from scratch or digitizing an existing form, our intuitive form builder allows you to create digital forms in minutes.
Why Digital Forms?
Docubee digital forms provide a number of benefits, including:
- Reduced error
- Decreased cost
- Secure eSignatures
- Saved time
- Automated form routing
- Instant access to data
As more work has gone remote, digitizing your forms also allows you to keep up with customer expectations.
How to Create an Online Form in Minutes
Creating a digital form in Docubee is easy. Watch the video and read the steps below:
Step 1: Upload your existing form
The first step is to upload your existing form into Docubee to digitize. The following file types are accepted: PDF, DOCX, TIFF, JPG, PNG and BMP.
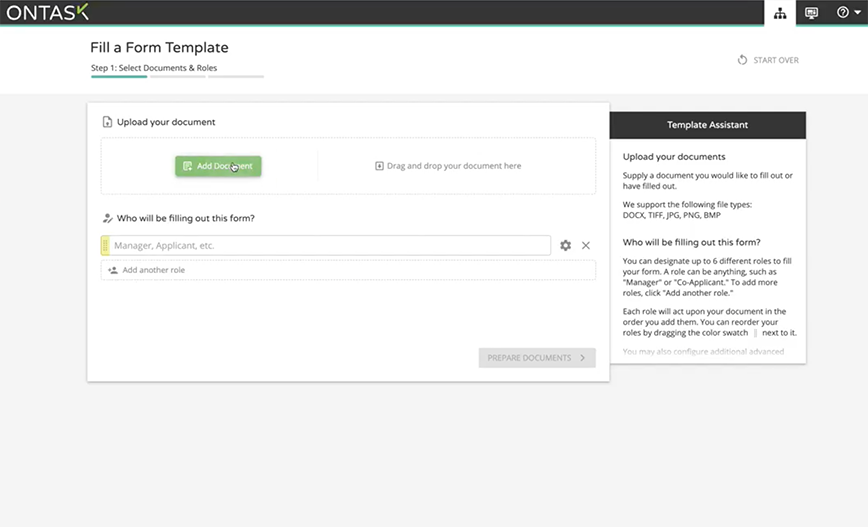
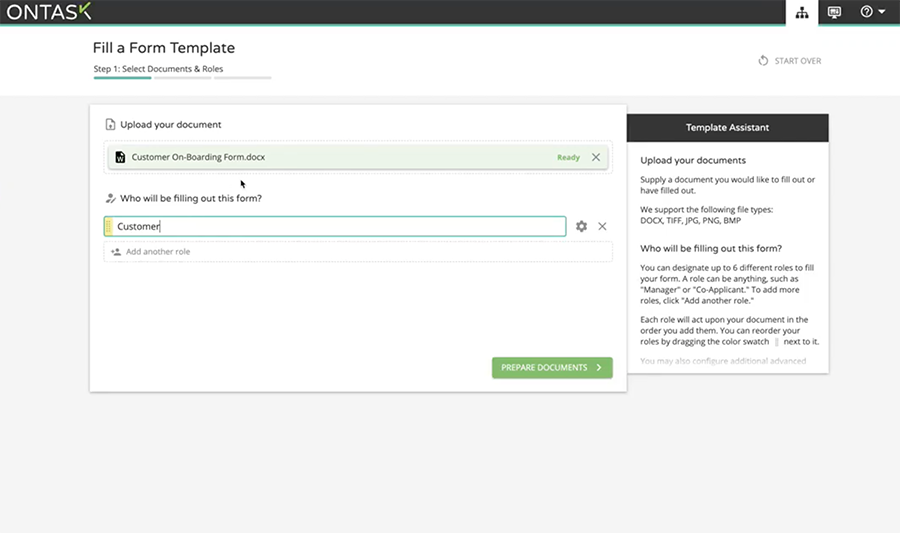
Step 2: Add users
Next, you can add the participants that will use the form — for example, customers, office staff, etc. You can designate up to six different roles to fill your form, and set an order for each role to act in.
Step 3: Scan, detect and modify form fields
Once your document is uploaded, Docubee scans it, identifies form fields, and lays them on the digital form where it recognizes the field. The fields can be resized and assigned to different roles. They can also be named with the data type that people should provide in each field, which helps participants know how to fill out the form and also makes the form more useful when data is imported or exported.
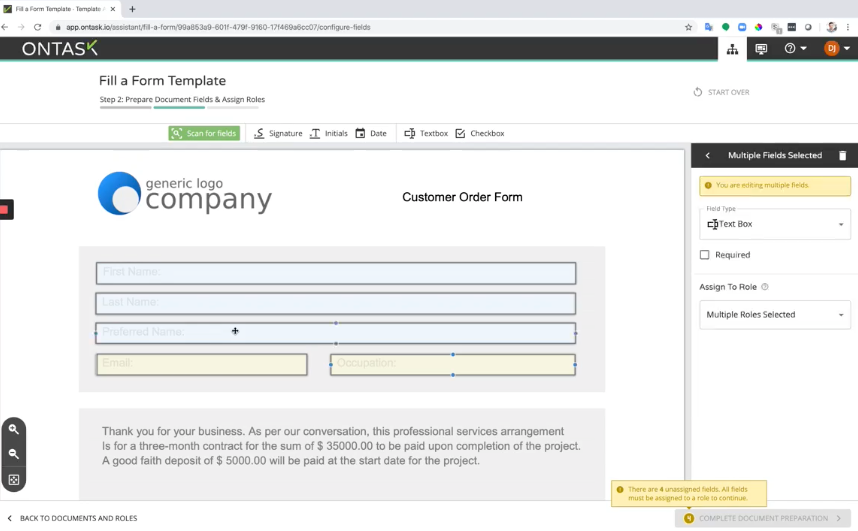
The field data types include signature, initials, date, textbox and checkbox. You can set textbox fields to have one line or multiple lines. Fields can be designated as required or not required, as well as read-only. For example, you may want to make a signature field be required.
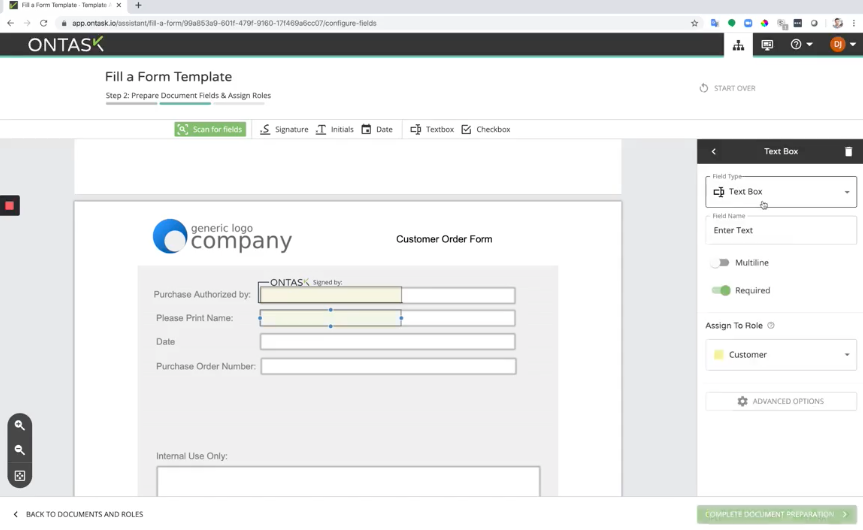
Docubee also allows you to pre-populate the date field with the date that participants provide their signature; making the platform easy for both you and participants.
Step 4: Save as a template
Every form you create can be saved as a template so that you can duplicate it for other forms you want to digitize in the future.
How to Incorporate Your Form in a Workflow
Digitizing your forms is a great first step in streamlining your business operations. However, automating the entire form process is even better. Here’s how you can leverage our Workflow Builder to automate your form.
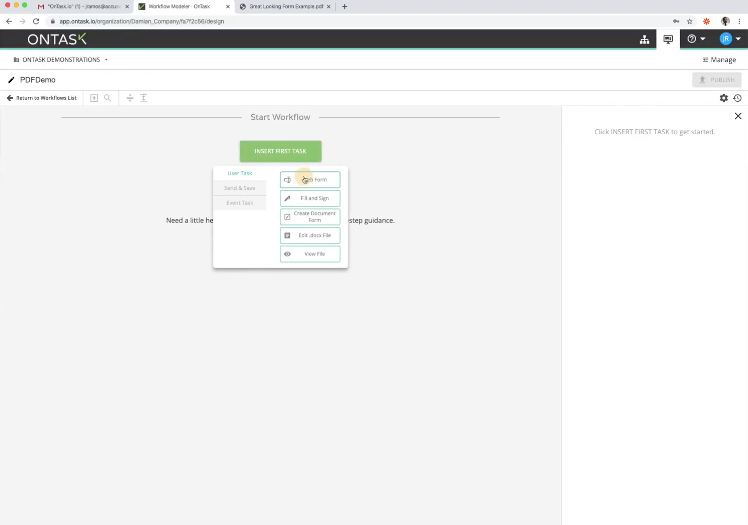
Step 1: Collect user information
In the Workflow Builder, each task block allows you to insert a task for the participants that involves documents. For our form process, we want to select Web Form as our first task and create a form that collects basic initial participant information, such as first name, last name and email.
Step 2: Insert your form
The next user task to select is the Fill & Sign task, which allows you to import documents and collect user inputs and signatures. Create a Fill & Sign task and insert your existing form. Then, you can follow the steps described above to digitize your form (scanning fields, setting field labels, etc.).
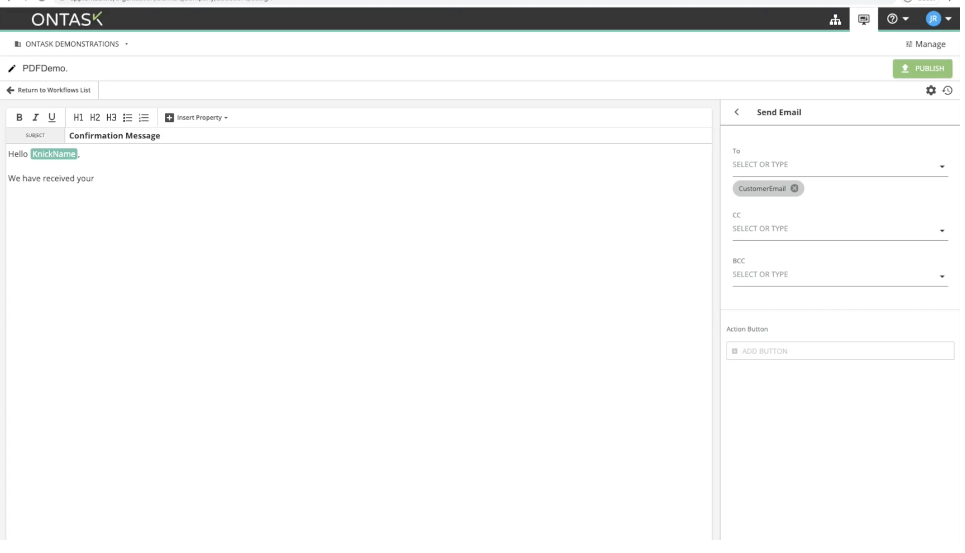
Step 3: Send to the participant
Next, you can insert a Send Email block, which will allow you to email the participant that needs to fill out the form. In this example, we’ll send an email to the customer. We can include fields from previous steps, such as the first name, to personalize the body of our email.
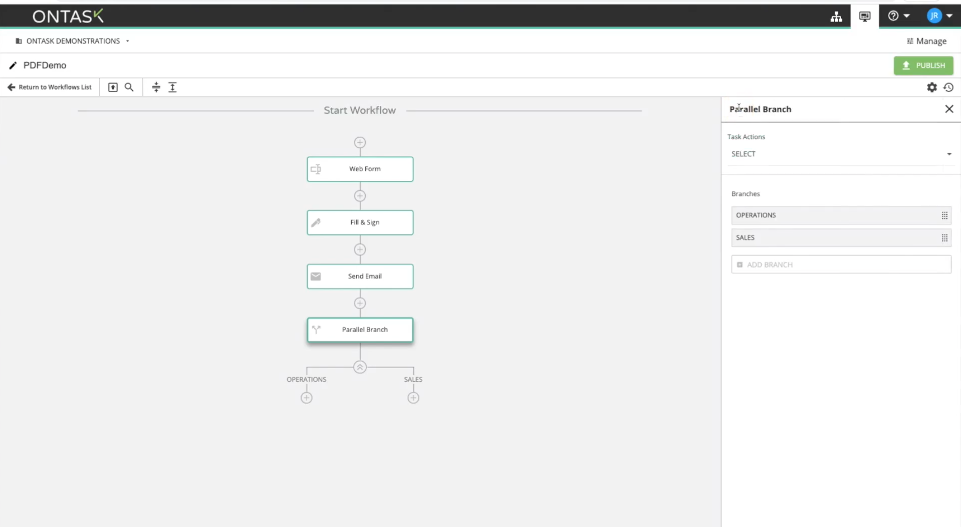
Step 4: Create the review process
If more than one team needs to review and/or approve the form, you can create a parallel branch as the next step. The parallel branch allows two users to execute a task, such as reviewing the form, at the same time.
You can also add features to your form process, such as an automated task reminder if the participant does not fill out the form within a certain time period.
Step 5: Run & share your workflow
Once you have finished adding all steps needed in your form workflow, you can save and run your workflow. It’s easy to share your workflow with participants and necessary stakeholders — you can share via a hyperlink, QR code, or SMS text messaging.
Your workflow can also be duplicated in the future and used for other processes at your organization, saving you time so that you don’t have to start from scratch.
Experience Docubee Forms
Docubee Forms makes creating online forms quick and easy. With our intuitive, no-code form builder, not only will you never have to scan another PDF—but it also means you can create workflows that automate and streamline your form processes.
