

Harness the Power of ChatGPT with Docubee and Zapier
Generate your unique document using AI, edit as needed, and send it out for signature with our new Chat GPT integration powered by Zapier.
OpenAI (ChatGPT) is a chatbot built on top of OpenAI. ChatGPT will generate text based on a “prompt” provided by an end user. It’s crazy easy: essentially, you ask ChatGPT a question and it will return an AI-generated response.
It only takes a few minutes of playing around with ChatGPT to realize this isn’t just a novelty, it can be a really powerful business tool, generating a great starting point for business related text like blog articles and even business agreements.
For example, you can provide ChatGPT with a prompt like “generate a Florida bill of sale for Ted Lasso selling a boat to Ironman for $40,000” and ChatGPT will respond with amazingly accurate and specific language.
In this article we will show you how easy it is to harness the power of our AI-generated content by using ChatGPT with Docubee.
Please note: AI integrations are not owned or controlled by Docubee or Accusoft. Content generated by AI is intended to be used only as a starting point for documents and agreements. Docubee strongly recommends that you review any contracts or legally binding documents with legal counsel before sending.
This article provides examples as well as a step by step look at how to use Docubee in order to generate a document using ChatGPT’s powerful AI, make edits to the generated document, add signature fields, and send the document to be filled and signed by a participant. Let’s dive in.
How to Connect ChatGPT to Docubee Using Zapier
To connect ChatGPT and Docubee, we will be using Zapier. Zapier allows us to easily connect these two web applications by triggering events upon the completion of certain tasks. It may sound complicated, but it’s super easy and takes just a minute to set up.
Before You Begin
To accomplish this set up, we will build two different workflows in Docubee. The first workflow will use Docubee’s webforms to collect the text we want to use to “prompt” ChatGPT, and the email address for the owner (this will likely be yourself) of the resulting document. When the Docubee form is submitted, Zapier will use the submitted text to make an API call to ChatGPT and wait for a response. This is how your document is generated.
Our second Docubee workflow will be called by Zapier when ChatGPT generates the body of our document. The workflow will create a document from the response text and email the owner with a link to view the document. When the owner clicks on the email link, they will enter Docubee’s document editor. This will allow them to make any necessary edits to the document. Once the edits are saved, Docubee’s workflow will advance to a preparation step where the owner (likely you again) can place fillable fields on the document including signatures, dates, and text fields. The owner will then have the ability to send the document to a recipient to fill and sign and both parties will receive a final copy of the resulting PDF.
Once those two workflows are set up, you’ll be able to enter a prompt in Docubee, and ChatGPT will produce your documents.
Create a Docubee Workflow to Collect the Prompt Text for ChatGPT
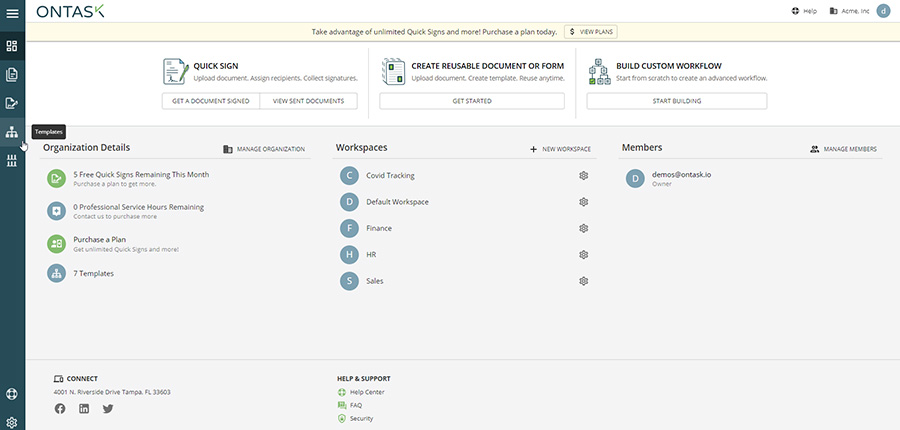
1. Create a new workflow. To do this, navigate to ‘Templates’ on the left hand panel of the Docubee dashboard.
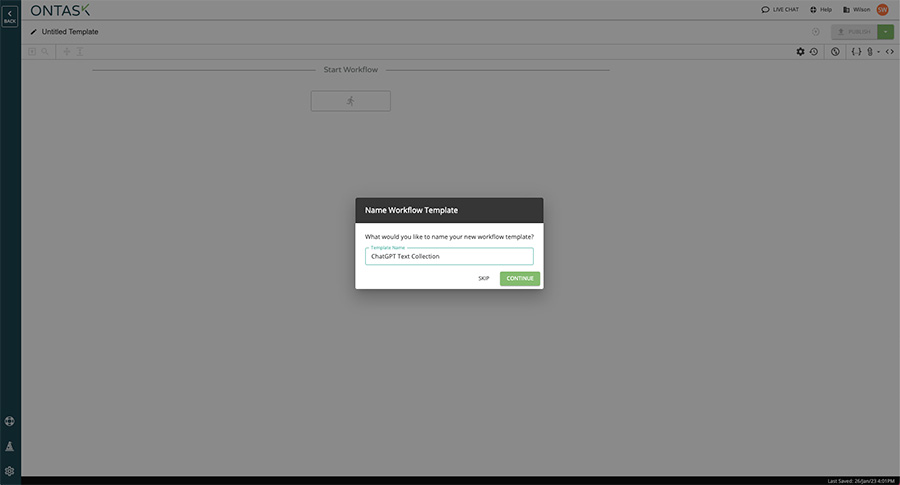
2. Click the green Create Template button
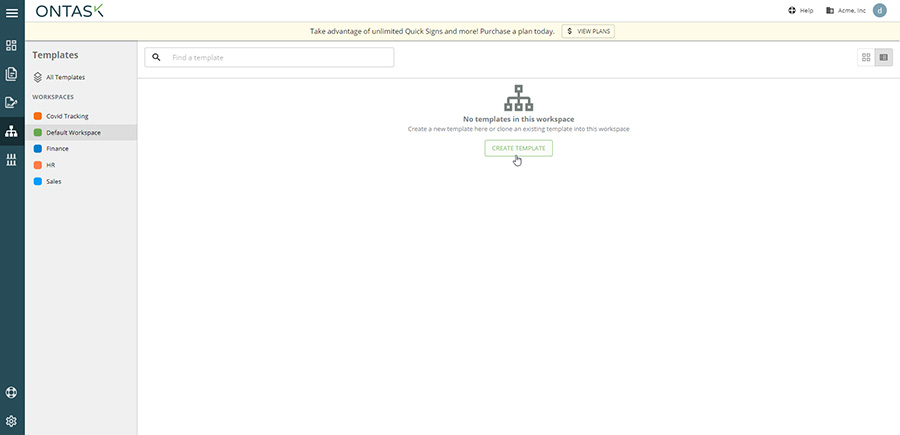
and name your workflow.
Build from Scratch or Use Pre-built OTW files
From here, you can follow the rest of the instructions below to build the workflows from scratch, or you can upload our pre-built OTW files and move on to the “Integrating Docubee with ChatGPT Using Zapier” section.
To upload the files, click the Export/Import Workflow Model buttonin the top right corner below the Publish button. Upload the Part 1 files and then click the Publish button to save your work. Then create another new workflow and use that to upload the Part 2 file and click Publish to save.
3. Add a webform task by clicking the plus (+) button under the “Start Workflow” text.
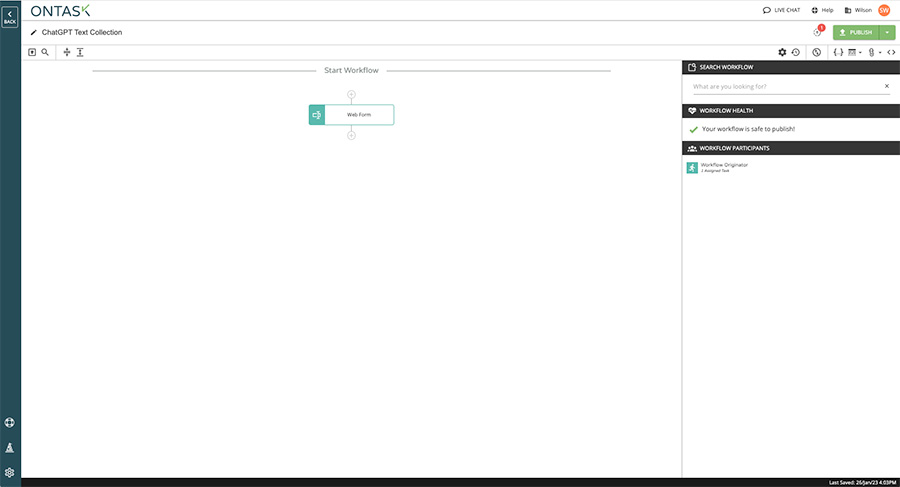
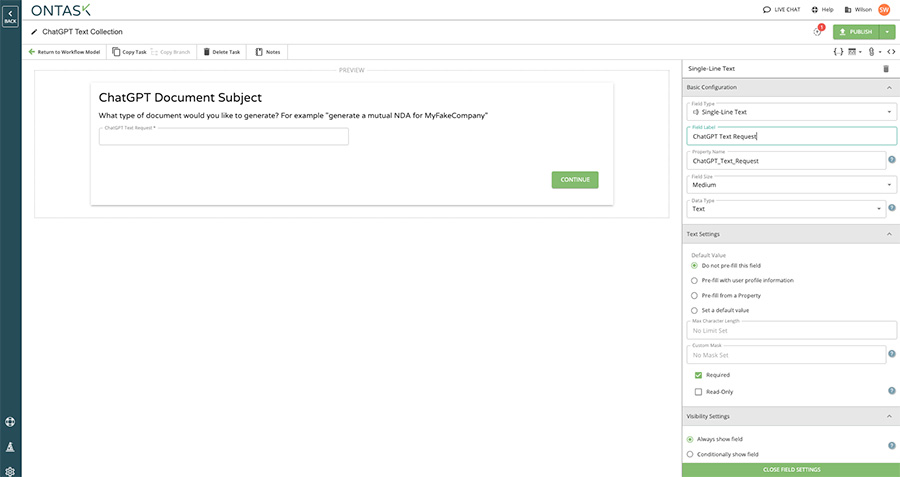
4. Next, click on the web form task to open it and make edits. Add a descriptive subheading and a single line text field called “ChatGPT Text Request” to collect the text for generating documents.
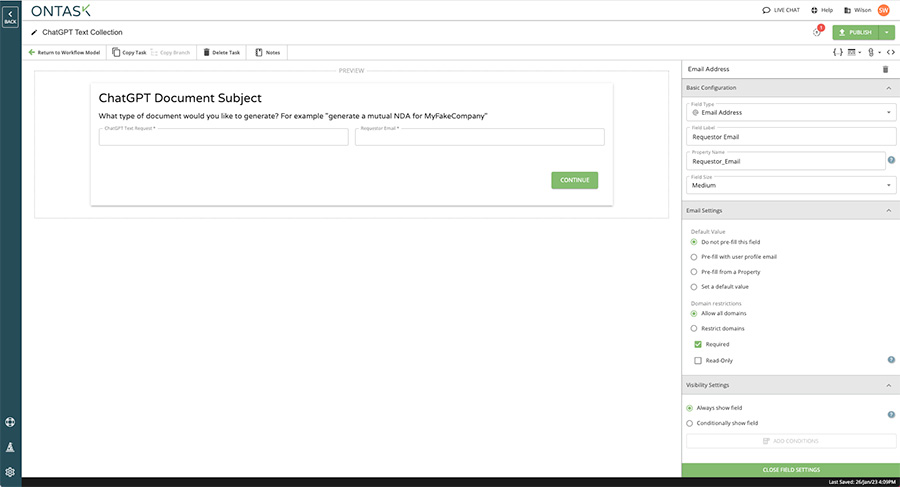
5. Add an email address field and call it “Requestor Email”. We will use this address later on to notify the sender that their document is ready.
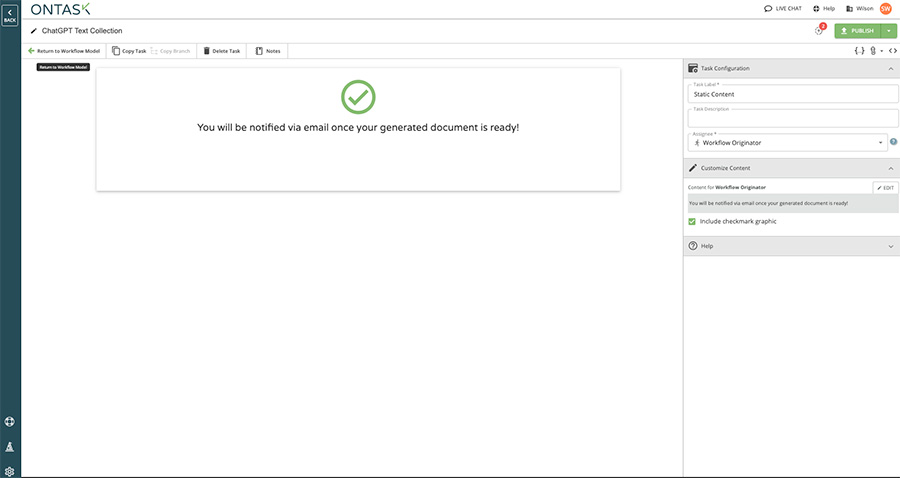
6. Click the “<- Return to Workflow Model” button in the top left corner and then click the plus sign (+) under our web form task to add a static content task (found under the workflow state category). This will be the message displayed to the requestor once their web form has been submitted.
7. Click the static content task and then click “Add” under customize content to create your message.
8. Click the publish button to save your work.
Create a Docubee Workflow to Connect to ChatGPT Using Zapier
While ChatGPT will return the text for a document, it can’t create the actual document file on its own. That’s where Docubee and Zapier come in. Docubee’s document generation capabilities can be used to generate a document from the ChatGPT text, allow a user to make edits to the document, and then send the document to someone else to fill and sign the document. This workflow will be called by Zapier once ChatGPT has completed the text generation.
Here’s how to set it up:
1. Create another new workflow in Docubee.
2. We now need to create a webform that will be used to collect the text back from ChatGPT once the text generation is complete. Add a webform task by clicking the plus (+) button under the “Start Workflow” text.
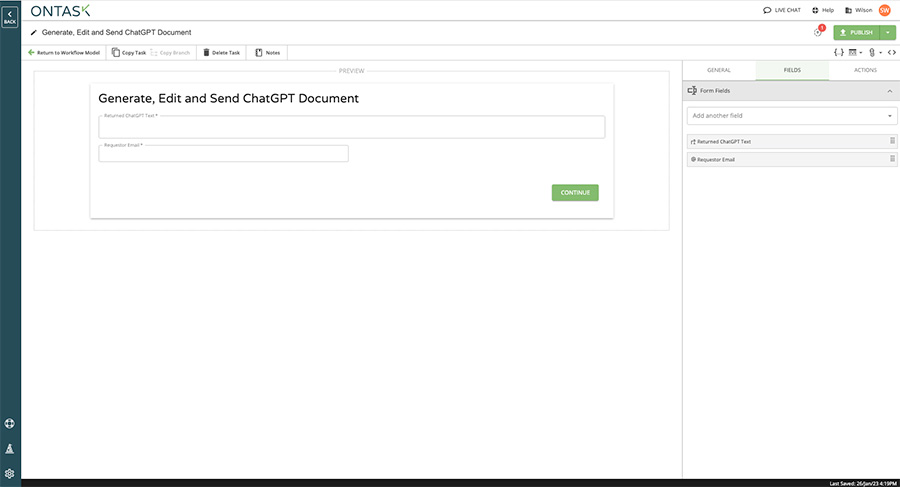
3. Next, click into the webform and add a multiline text field named “Returned ChatGPT Text”.
Add an email address field to your webform as well as collect the Requestor Email we sent from the first workflow.
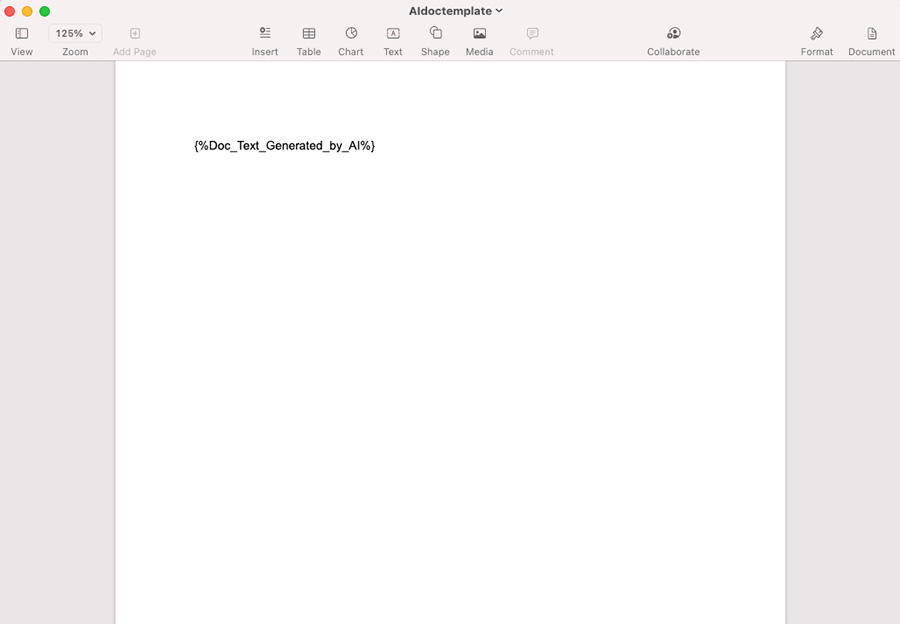
4. Docubee’s document generation works by replacing placeholder text in Word docs with data from the workflow. Create a blank Word doc and just include one line as a placeholder for our document text using the following placeholder text: {%Doc_Text_Generated_by_AI%}. Save the document as a DOCX file.
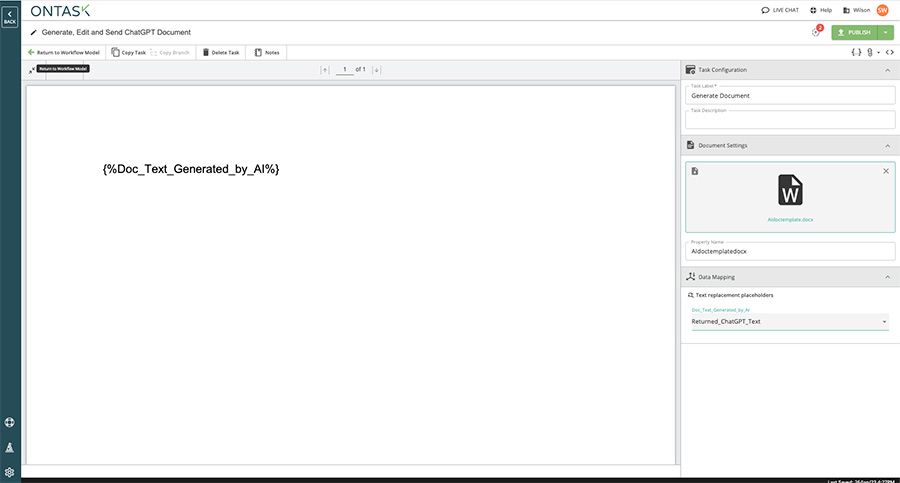
5. Now it is time to generate our document using ChatGPT’s generated text and our placeholder DOCX file. Return to the Docubee workflow model and create a “Generate Document from Form Data” (under document processing) task.
6. Click on the task and upload our DOCX file to the right hand navigation. Docubee will recognize the placeholder task and recommend mapping that text to the Returned_ChatGPT_Text form field from our previous webform task.
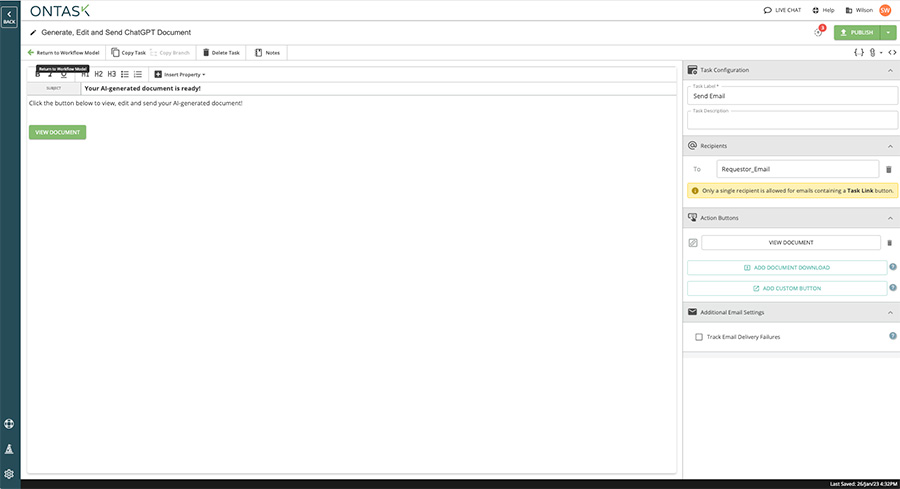
7. At this point in the workflow, Docubee has generated a document using the text returned by ChatGPT. Now we need to notify the requestor that their document is ready and give them a link to click to view and work with their document. Click “Return to Workflow Model” and add an email task (send and save) right after our Document Generation task.
8. Type in a message for our requestor in the body and title of the email. Make the recipient “Requestor_Email” and then click on “Add task link button” on the right hand side of the screen.
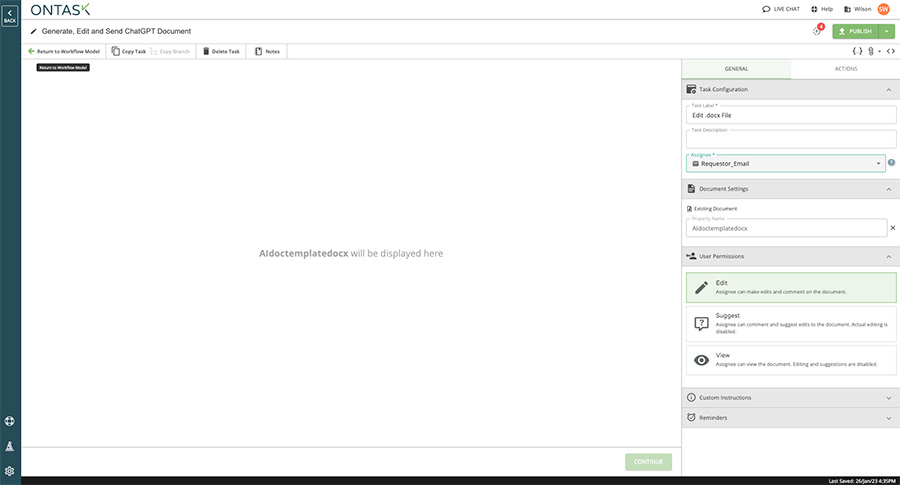
9. Now that our user will be notified, let’s create the task they will see when they click on the task button we just created. The text that ChatGPT generates is great, but we still want to give users the chance to make final edits and corrections to the document before we start to use the document. Luckily, Docubee has a built-in document editor, so let’s add a task for editing documents now.
Add a “Edit .docx File” task directly under our preview email task. Under document settings, select our document from the document generation task and change the assignee from Workflow Originator to “Requestor_Email”.
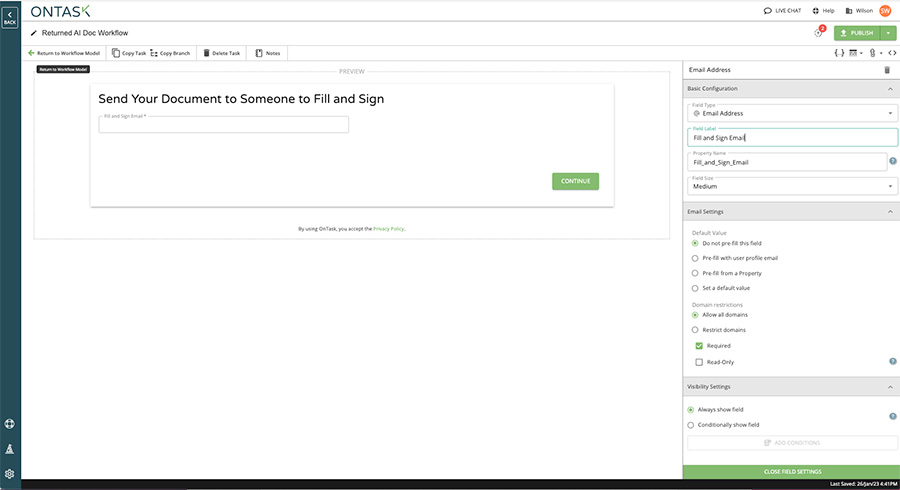
10. Now, let’s add an option to fill and sign the document. To do this, we first need to collect the email of the person that will be signing the document. Now, hit the plus sign (+) again in the workflow builder to create a webform task directly after our “Edit” task (before the “Fill Document Form” task) and add an email field called “Fill and Sign Email”.
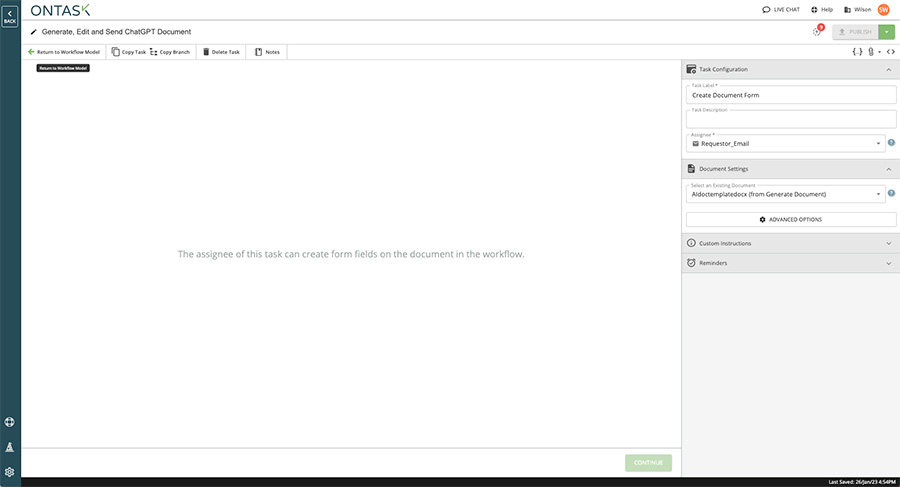
11. Next, you’ll add a “Create Document Form” task after the webform task we just created. This task is used for a user to add fillable fields to a document. Ensure the assignee is “Requestor_Email” and our document is selected under “Document Settings”.
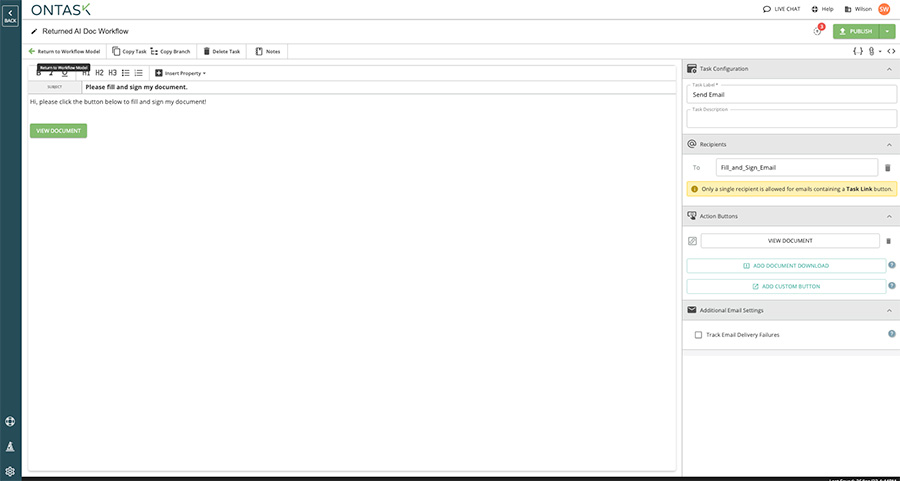
12. Now we need to email the person a link to view, fill, and sign our document. To do this, add an email task right after the previou task you added. Make the recipient “Fill_and_Sign_Email”.
13. Add a button to your email by clicking the “Action Buttons” and selecting “Add Document Download”.
14. When we created the Create Document Form task in a previous step, you will notice that Docubee automatically created the “Fill Document Form” task for us. That is the task our end user will use to fill out the generated document. Click on the task and assign it to “Fill_and_Sign_Email”.

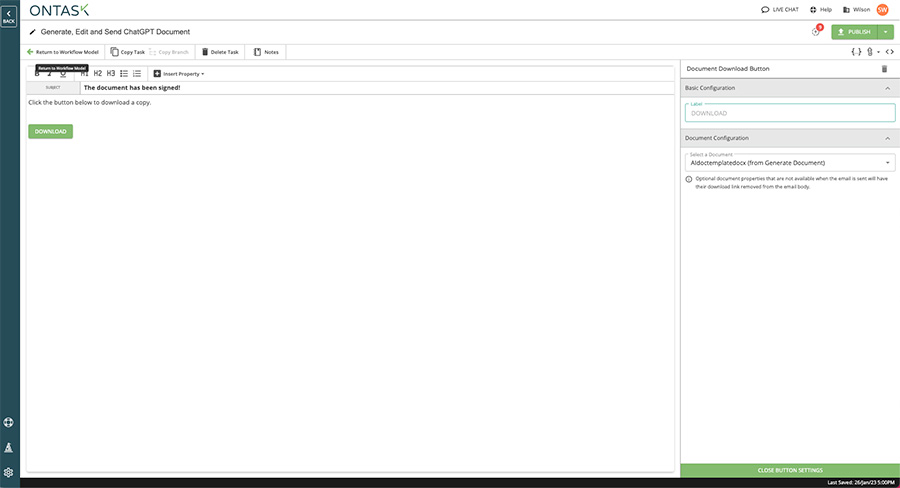
15. Our last step is to send the requestor a completed copy of their generated and signed document. Add an email task and set the recipient to “Requestor_Email”. Additionally, by clicking the “Action Buttons” and selecting “Add Document Download”. Select your document.
16. That’s it! Publish the workflow to save your work, and you’re all set.
Integrating Docubee with ChatGPT Using Zapier
Now, it’s time to set up our Zapier integration with ChatGPT. This is essential to make sure things flow as they should. Here’s how to set up the integration:
Integration Checkpoint
Have you set up the first part of your workflow yet? Either download these OTW files to get started or review the steps in the first section titled, “Create a Docubee Workflow to Collect the Prompt Text for ChatGPT” to start from scratch.
Generate an Access Token in Docubee
To connect our Docubee workflows with Zapier, we need to generate an API key in Docubee.
1. From your Docubee dashboard, click on Manage Organization in the top right profile navigation.
2. Click on your workspace in the left-hand navigation and then “Access Tokens”.
3. Click Add API token, name it, and then select “List workflow templates” and “Manage Zapier triggers” as the permissions to be included in the token.
4. Copy the API token and save it to a note for reference in the next steps.

Generate an Access Token in OpenAI/ChatGPT
Similarly to our previous step, we need an API token from ChatGPT to connect with Zapier.
5. Sign up or log in to https://openai.com/api/.
6. Click your profile in the top right and then “View API keys”.
7. Create a new secret key and save it to a safe place for these subsequent steps.

Integrate Docubee with OpenAI (ChatGPT) via Zapier
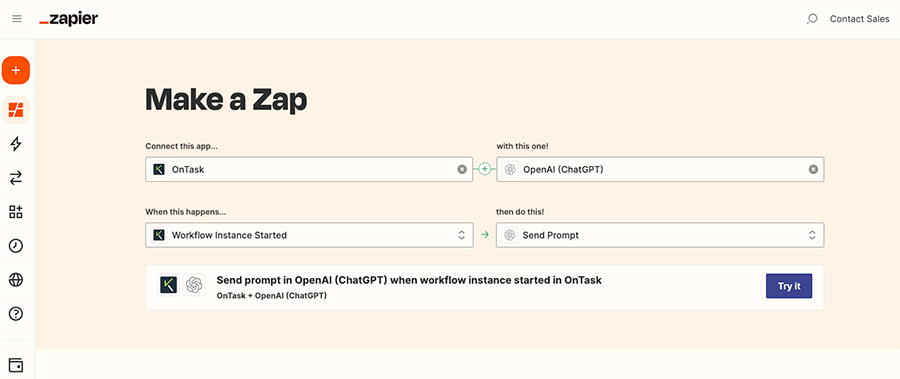
8. Log in to Zapier and connect Docubee when the workflow instance is started with OpenAI (ChatGPT) send prompt.
9. Click “Try it” to enter the Zapier editor.
10. In Zapier’s editor, click on the Docubee zap.
11. On the choose account card, click sign in and when prompted, enter the Docubee API key you generated in previous steps.
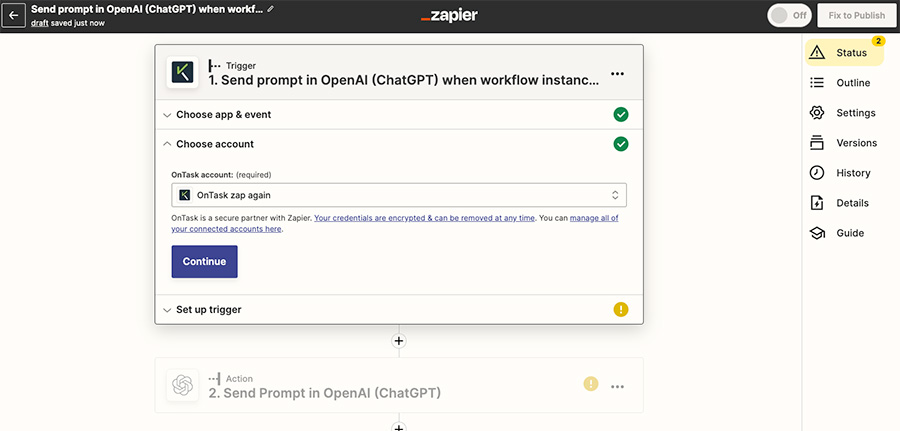
12. Click continue and then on the trigger card, and select the first workflow you created above that collects the ChatGPT prompt. Successfully test the trigger and move on to the ChatGPT zap.
13. Sign in to ChatGPT and enter your API key when prompted.
14. On the set up action card, click on the Prompt field and choose your text field created in the Docubee workflow to collect the prompt text. It should be called Document_Idea_To_Generate if you named it the same as the instructions above.
15. Set maximum length to 2000 but leave everything else default and click continue.
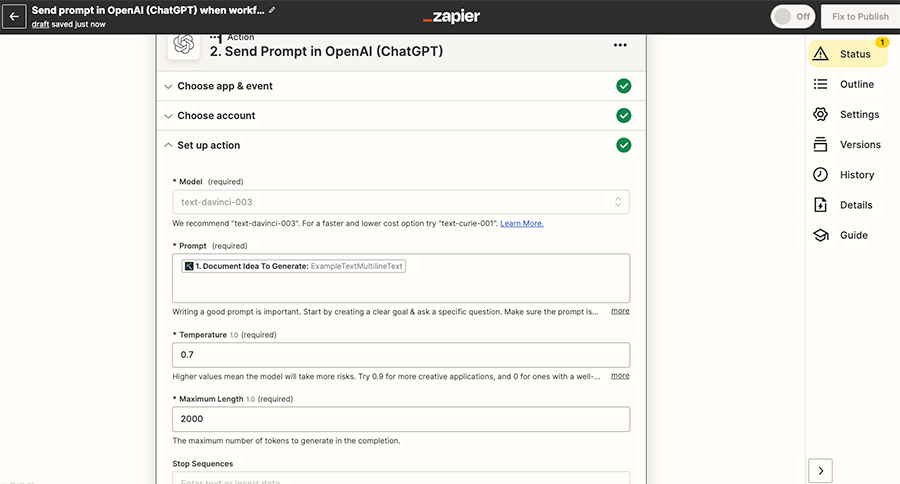
16. Test the action but don’t publish the zap just yet.
17. Now, we need to set up another action to call Docubee once ChatGPT is done generating the text.
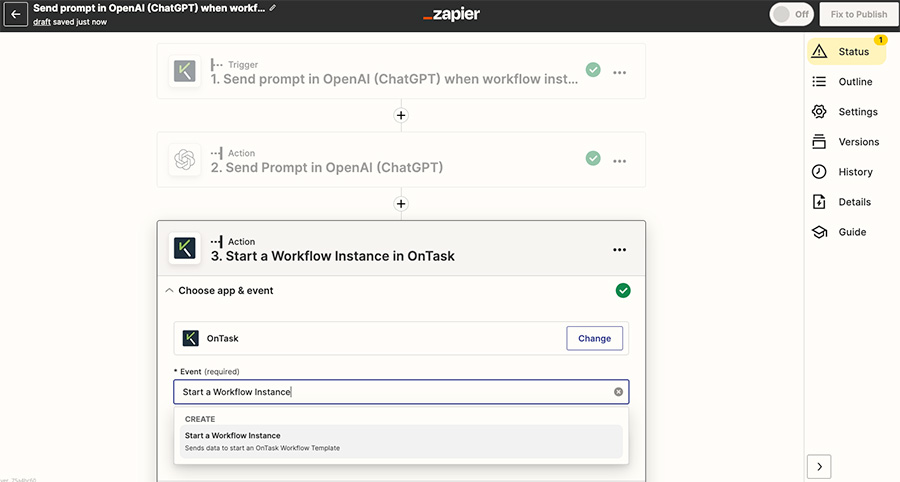
18. Click the plus sign (+) under your ChatGPT zap and add a new action.
19. Search for Docubee.
20. Under the event select “Start a Workflow Instance” and click continue.
21. Choose your Docubee account and continue again to the “Set Up Action” step.
22. Select the second workflow you created in Docubee to handle the Generate, Edit and Send of the document.
23. In the Returned ChatGPT Text field, navigate to “show all options” under ChatGPT and choose 2.
Choices Text:
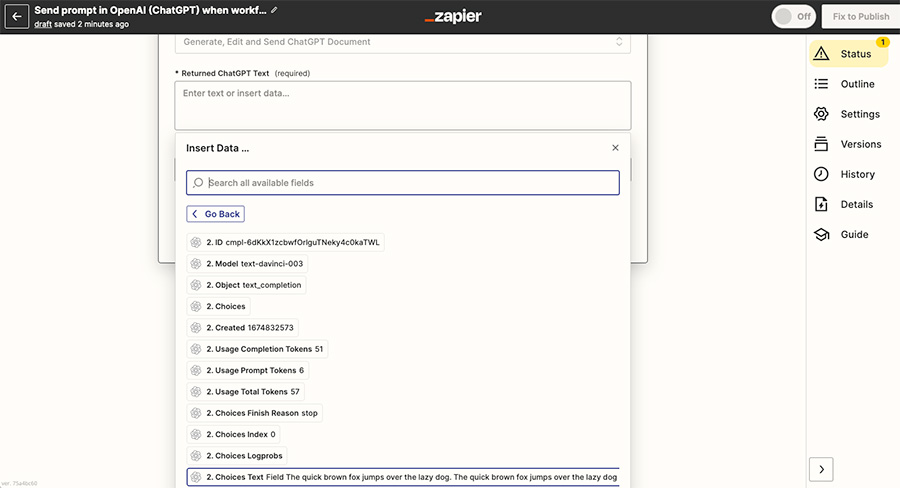
24. For the Requestor Email field, choose the email field in your Docubee workflow and click continue.
25. Once you successfully test the Zap, you are ready to publish and turn on the Zap!
Generate and Send a Document using ChatGPT and Docubee
Now, you’re ready to start sending. Here’s how to use your newly launched integration:
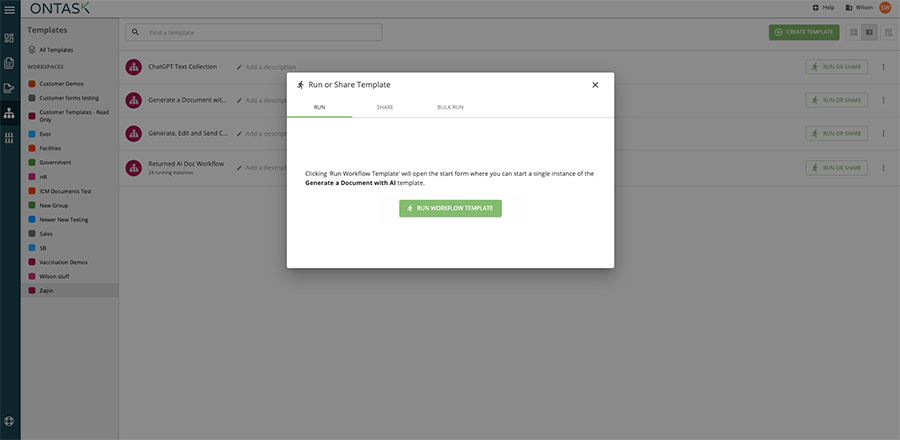
1. To use your new ChatGPT and Docubee integration, go to your Docubee dashboard and navigate to the workflow templates section.
2. Click Run or Share next to your ChatGPT Text Request workflow, and then hit “Run Workflow”. You can also copy the URL from the share tab to launch the workflow at any time.
Use AI to Power Your Documents with Docubee
With the help of AI from ChatGPT, it’s easier than ever to create and send documents. If you have questions about setting up your integration, drop us a line and we’ll be happy to help you navigate.
Ready to get started? Start your free trial now.
