

Quick Sign with Expiration Dates
View our Pricing & Plans for a detailed list and comparison of features available in each plan.
Would you like to prevent your signer from signing a document after a certain date? Would you like them to be automatically reminded of the expiration date? Then, use the Expiration date option when setting up your Quick Sign (QS) process.
Adding an expiration date to a QS process allows you to stop a signer from being able to sign a document after that date. One day before the expiration date, a reminder is automatically presented to the signer in Docubee to alert them of the upcoming signing expiration date.
If a signer does not sign by the expiration date, the QS process is canceled.
Note: See Quick Sign for more information on getting a document signed and managing your sent QS.
In this article:
Set Expiration Date for Quick Sign Process
- In the Dashboard, select Get a Document Signed to open the Quick Sign modal.
- Upload a document or select a template.
- Click Continue.
- Select Send and Sign, enter the signer’s Role, Email, and Name, use the toggle switches to set whether the signer should receive the finalized document(s) and/or attachment(s). Add additional signers and/or recipients as required. See Quick Sign | About Recipients for more information on recipients.
- Click Continue to open the Prepare Document modal.
- At the upper-right click Send For Signature.
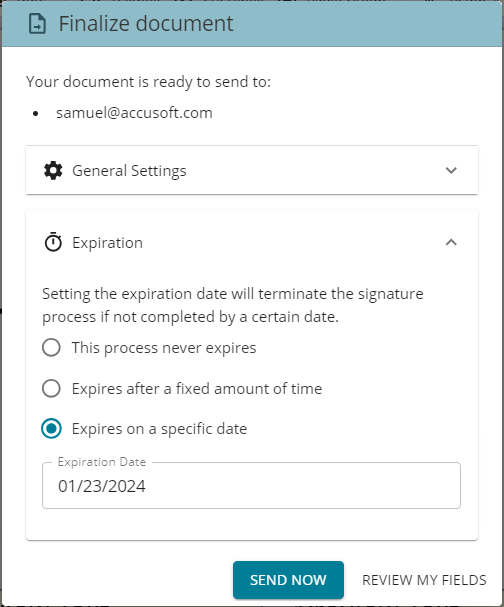
- In the Finalize document modal, click on the Expiration dropdown menu and set your expiration date to one of the available options:

- This process never expires.
- Expires after a fixed amount of time – Set the Years, Months and Days to configure the duration.
- Expires on a specific date – Click in the Expiration Date field to open a calendar where you can set the year, month, and date. Click Ok or Review My Fields.
Note: If you click Review My Fields you are back on the Prepare Document modal where you can review your fields. When ready, click Send for Signature. In the Finalize Document modal that is displayed again. Your expiration settings will be as you had set it; you can still modify it.
- Click Send Now.
- Your document has been sent! If you send this document often, you can choose to save it as a template which would save you time assigning fields each time.
- Enter a name for this template and click Save as Template.
The Signer’s Experience
Signers will receive an email informing them they have a document to review and sign. It includes a Review Document button that will navigate them to the document.
Note: You can also review it from your dashboard’s Quick Sign module or in the Documents page under Quick Sign.
- Select the workspace.
- From the list of QS processes, select the one to sign.
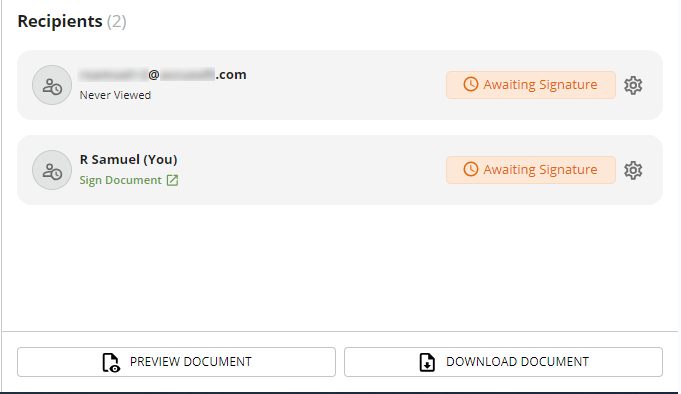
- In the right pane, under Recipients click the Sign Document link available to you.
- The document to sign is displayed. Sign the document and click Submit Document.
- The message, “Your document has been signed successfully”, is displayed.
Related Information
Quick Sign
Quick Sign Document Templates Overview
Docubee 101 September Webinar Recording (includes an overview of Quick Sign as of Sep 2023)
Additional Resources
Need more help getting set up? Contact us for assistance from our customer support team.
